Hi, I'm Meagan. Welcome to Style-Edition!  I am a style enthusiast. I love exploring creativity through decor and fashion and this is where I share my musings, inspiration, and projects.

Thanks for stopping by!

I welcome your feedback and suggestions at meaganmari[at]gmail.com

What do you want to see?

Entries in How-to (6)

Tuesday
Jul312012

How to Make Simple Cupcake Baking Cups at Home

I was recently baking cupcakes late one evening and realized I had run out of baking cups.  With the batter already made and the oven pre-heated, it didn't make sense to run out to the store; so I improvised with what I had, parchment paper. I was pretty happy with the way my home-made wrappers turned out so I figured I'd share for the next time you're in a bind. (Sorry for the horrible iPhone pictures)

I brought these into work the next day, and I think the hand made wrappers made them seem a bit fancier than your typical store bought cupcake baking cups.

Sunday
Apr082012

Easy Homemade Granola Recipe

Granola & greek yogurt is one of my favorite breakfasts so I've been working on perfecting my homemade granola recipe.  It's surprisingly easy to make, and I love that I can customize it with whatever nuts, dried fruit, or spices are available.

Here is the basic recipe I used most recently:

Ingredients:

8 cups rolled oats

1 ½ cups flax seeds

1 cup ground flax seeds

1 ½ cups coconut

2 cup almonds (or other nuts), chopped

1 ½ teaspoons salt

½ cup brown sugar

¼ cup maple syrup

3/4  cup honey

1 cup vegetable oil

1 tablespoon ground cinnamon

1 tablespoon vanilla extract


Directions:

Preheat the oven to 325 and line baking sheets with parchment paper.

Combine the oats, nuts, cocunut and seeds in a big bowl.

In a saucepan over medium heat, stir together the brown sugar, maple syrup, honey, oil, cinnamon, salt and vanilla and bring to a boil. Then pour over the dry ingredients, and mixing to coat the oats

Spread the mixture out evenly on the baking sheets. Bake in the preheated oven until crispy and toasted, about 20 minutes. Stir once halfway through. If you want to add raisins or dried cranberries, stir them in after the granola has cooled.

Store the granola in airtight container.

Tuesday
Mar272012

Following Blogs: A Quick Little "Reader" How-To

A break from my regular style postings for some technical advice: I often have family and friends ask me about how to keep up with the many blogs and sites that they are visiting everyday, so I figured a quick "how to" might be helpful.

Are you bookmarking every blog you  like and visiting it every day? If so,  there is a better way!!

Using a Reader:

RSS readers allow you to subscribe to feeds from sites  and read them from a central location instead of visiting each individual website on a daily basis.  (Saves time and puts all the content you're interested in, in one place!)   Most sites will have a little orange RSS logo or a link that says "Subscribe to feed" that allows you to easily add that site to your "Reader" of choice.    I use Google Reader  because I'm always on gmail and that way I can pull up my reader on any device (personal computer, work laptop, iPad, iPhone etc)  I also love how it allows you to label, file and "star" articles so you can reference back to them (I especially found that useful pre-Pinterest).  If you use Microsoft Outlookto manage email, you can also subscribe to RSS feeds so they pop up right in your Inbox. This is great if you want to read messages offline. (Microsoft Outlook RSS info here)

Here is a quick step by step on how to set up your favorite blogs on Google Reader:

1.  Find a blog (uh.... Style-Edition.com.. duh)

2.  Find & Click on the RSS/Subscribe to Feed link.  With some browsers, this takes you to a page where you can select your reader.  Here you can select "Google Reader"

3.  If you can't find th RSS link and/or it doesn't give you the option to select a reader,  Don't fret!  Google Reader is smart.   Just copy the URL of the blog  and click "Subscribe" (image below)  Smarty-pants Google will automatically find the feed and add it to your Google Reader list.


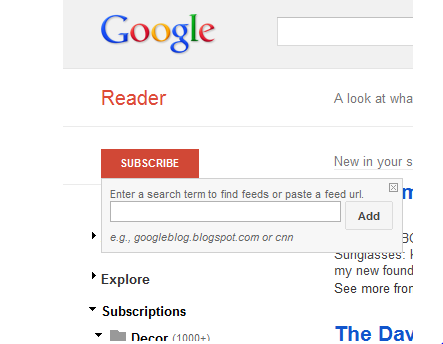
 4.  Now, you should be all set up!  Instead of using a bunch of bookmarks etc, just go to Google Reader everyday  to see the new articles from your favorite sites.

Bonus:  If you follow a wide variety of blogs/sites (for example I have fashion, decor,  news, work-related sites etc)  You can creat "Tags" for each them to file them separately. 


Bloglovin:

Bloglovin' is another easy to use  "reader" to follow your favorite blogs.  I prefer Google Reader, except for when I'm on my iPhone.   Bloglovin has a great, easy to use app that allows you to read blogs on your mobile device.   Setting up Bloglovin is super easy.

1. Create a Bloglovin' account

2.  Find the Bloglovin link on your favorite blogs

3.  This link should take you directly to Bloglovin, and as long as you're logged in, you should just have to click "Follow" and it will be added to your list.

4.  Either head on over to Bloglovin.com or download the app, and then you can use the site to read all the new articles an aggregate every day.

I hope that helps!

---

PS - Here are the Style-Edition links:

Style-Edition Blog RSS Feed
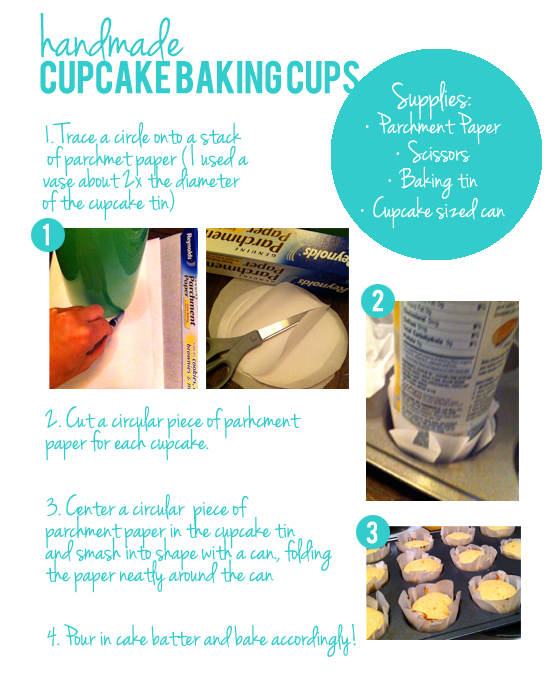
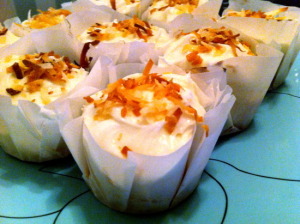
Sunday
Dec112011

Holiday How To: T-Shirt Pom Pom Ornaments

Each year I like to make ornaments to add to my tree and I wanted to share a quick and easy project with you guys that you can make using old t-shirts: 

1.  Starting with on old t-shirt (or in this case a tank top) cut and rip 1/4 to 1/2 inch wide strips. 

2.  Once you've ripped the shirt into a pile of knit strips, you're ready to make them into a pom. It's OK if the t-shirt strips are varying lengths and widths.

3.  Wrap the strips around your a piece of cardboard slightly bigger than the width of the pom-pom you want.  When you hit the end of a strip, just layer the second strip over the end and keep wrapping around.

4. Once you have layered on the strips of t-shirts, pull the ball off the cardboard and tie an additional strip tightly around the center with a double knot.

5. Squeeze the scissors into the layers of t-shirt strips and cut them in half.  

6.  Now,  you should have a slightly lumpy looking pom-pom.  From here, fluff up the edges and then trim it into the an even shape.

Finally, tie it onto an ornament hook or present and you've got a festive handmade holiday decoration!  

Tuesday
Aug022011

Cute Art from Paint Chips

I've been following Jessica who blogs at How About Orange for at least a year now, and she always has fun projects and "How To's."   Her most recent one was so simple and cute that I had to share.

She showed how to take these:  

And make this darling little aret piece:

All she did was cut the paint chips into triangles, arrange them in a pattern she liked and pop it in a frame.  (read the full How About Orange "how to" here)

This would totally work with any colored paper, but I love the texture  and saturation of the paint chips!

(I take no credit for the idea or photos.  This is all re-posted from How About Orange. I just loved it and had to share!)